This is the day the LORD has made. We will rejoice and be glad in it.....PSALM 118:24

Saturday, April 30, 2016

Sparkle N Sprinkle's May 1st Reveal

Welcome to Sparkle N Sprinkle's
 May 1 New Reveal Blog Hop!


We have six new stamp sets to share with you today.  These new sets are 20% off until May 3.  So once you finish the blog hop, head on over to the store and start shopping.  All of the new sets are available on cling mounted rubber or as a digital image.  


The sets are:


 Gone Fishing 778 (digi version DIGI778)
 Just Go Fishing 779 (digi version DIGI779)
  Summer Grilling #1 780 (digi version DIGI780)
Summer Grilling #2 781 (digi version DIGI781)
Nasturtium #1 782 (digi version DIGI782)
Nasturtium #2 783 (digi version DIGI783)


On May 3rd, ONE GRAND PRIZE WINNER will be selected from the comments left on the Designers' blogs listed below. Please leave a comment with each Designer in order to be eligible for the Grand Prize.  You never know who the Mystery Designer will be that has the winning comment.

The Grand Prize Winner, which will be announced on the SNS Facebook page and on the SNS Blog, will receive ALL of the new stamp sets released this month (or the digi versions, if preferred).


The Blog Hop order this month is:

(*Tip: if you have difficulty with a particular link, try clicking on the Designer's blog title to send you to their Home page.)


This month's stamps have been so much fun to play with!!  I used the digi version of Just Go Fishing to create a shadow box.


To start my project I cut the shadow box using my Silhouette.  Next I took the back panel and created my sun rise using Tim Holtz's Rays stencil and distress inks.


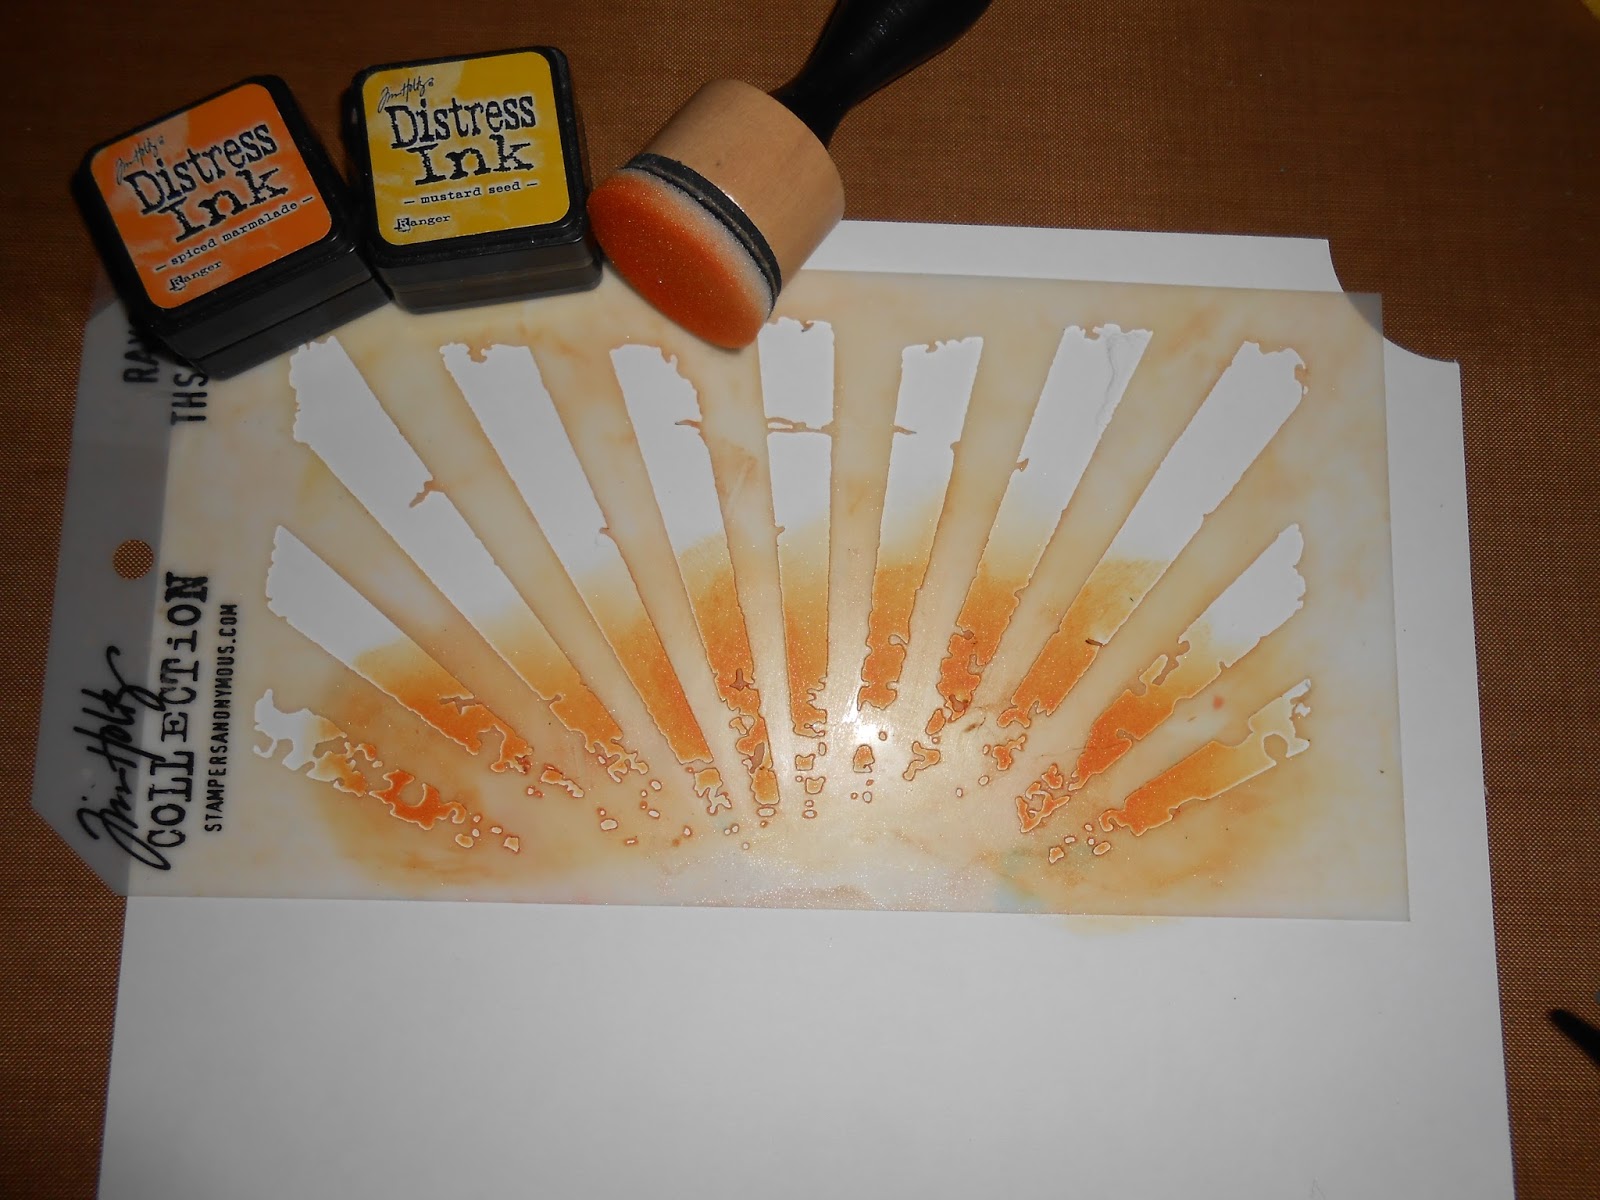
Spiced Maramalde ink was used to start the sun rays.


I then filled in the remaining areas with Mustard Seed distress ink and blended well with the blending tool.


The stencil was removed and the bottom area was inked using Tumbled Glass distress ink to create the water. (Sorry I forgot to take a picture). I brushed brushable  glue onto the background and covered it with Sparkling Snow glitter for the beautiful sparkle.  Once the background for my box was completed I printed the image and had my Silhouette cut it out.  The tree branches and cattails was also cut using the Silhouette. 


The branch was inked using Memento Espresso Truffle and Bamboo Leaves.  After inking I stamped the leaves using the Seasonal Tree stamp set.


The cattails were also inked using the same ink.  The sentiment was printed and placed on top of a green pull ribbon.On the edges of the shadowbox I placed Green Apple Crystal Drops for embellishments. Sparkling Snow glitter was added to the cattails using brushable glue.


The grass was die cut using the Outdoors Edges from Elizabeth Craft.  The branches were die cut using Sizzix's Branches and Leaves dies.  For the little flowers they were die cut using Spellbinder's Hydrangea die.  I inked the edges and placed small drops of Green Apple Crystal Drops.  The small dragonflies are brads.  

We hope you enjoy the New Reveal Blog Hop as much as we do.  Thanks for joining us and remember to comment on each of the Designers' blogs to be eligible for the Grand Prize. 

 Next stop on our blog hop is ANNE !

 Wonder who the Mystery Host will be this month????


The Sparkle N Sprinkle Creative Challenge also begins today.  There are lots of prizes and recognition badges.  Come check out how you can become a SNS Featured Artist as well.  The theme is always Anything Goes using Loose Glitter, Embossing Powder, and/or Flock.


Have you checked out the SNS YouTube Channel featuring Demo Donna?  If not, then you are in for a real treat.  Subscribe today to get all the latest Demo Donna tips and techniques!


Monday, April 25, 2016

Good Evening All


Hope your week is off to a great start!!  Today I would like to share a couple of cards with you that I made for my little sister's birthday and a baptism card for a sweet little girl in my Sunday School class.

Anna Griffin embossing folder was used for the background panel.  Next the pleat was created using this tutorial.  I placed a piece of Tear-ific Tape under the pleat and glittered using Sunny Daze glitter.  A piece of 1/2" Tear-ific Tape was placed along the top of the pleated layer and glittered with Sunny Daze glitter.


Close up view of the flowers. The centers of the flowers are Green Apple and Bubblegum Blush Crystal Drops.


3 small dots of Bubblegum Blush Crystal Drops was added for embellishments.


For the baptism card I used a Anna Griffin embossing folder, inked the raised areas.  The cross was cut using my Silhouette. 

Thanks so much for stopping by have a wonderful evening and remember....Keep Stamping!!

Wednesday, April 20, 2016

Caged Bird


Good morning everyone, hope you are having a wonderful day!  I would like to share a project with you using SNS products and Want 2 Scrap chipboard.

Caged Bird

To start my card I created my background using embossing pasteUltramarine Blue Color Burst, a  Prima stencil and Sparkling Snow glitter.

prep

I placed a small amount of embossing paste onto my craft mat and tapped a small amount of powder into the paste and mixed well.  The stencil was placed on top of a piece of watercolor paper and the embossing paste was applied on top.  The stencil was removed and I had a beautiful background layer.

Caged Bird

While the paste was still wet I lightly dusted the entire piece with Sparkling Snow glitter for a pretty sparkle.
The bird cage was die cut using Tim Holtz's Caged Bird die and embossed using Vintage EP.  This step was repeated twice.

Caged Bird

The small bird was covered with versamark and embossed with Skylight EP.  I decided that I need a bit more color on the bird so I re inked the tail with versamark and embossed with Flashy Flamingo EP, which gave it a pretty sparkle.

Caged Bird

I re inked the bottom of the bird's belly and embossed using Daffodil EP.

Caged Bird

To add the spots I placed a few piece of the Super Thick White EP and heated from underneath.

Caged Bird

The small Hydrangea was die cut using Spellbinder's die.  The flowers were inked on the edges and a small dot of Green Apple Crystal Drops were placed in the middle.  Two larger dots were placed on the bird cage using Green Apple and Bubblegum Blush Crystal Drops.

Caged Bird

Small leaves were added to the top of the cage using Sizzix Branches and Leaves die.
Thanks so much for stopping by, have a great day and remember....Keep Stamping!


Wednesday, April 6, 2016

Thank You

Good morning everyone, hope your day is off to a great start!! I would like to share a new project with you using Want2Scrap chipboard and SparkleNSprinkle glitter and EP!

Thank You

Creating the background

gelatos

Using Metallic Mint, Metallic Blueberry and Yellow gelatos, I smeared them onto my craft and lightly misted with water.

paper

Watercolor paper was then placed on top of the colors.  The paper was removed and dried using my heat tool.

background

 Once the paper was dry I placed the paper back on top of the remaining color and repeated the drying steps.

background1

The colors and shimmer of the metallic gelatos are so pretty!

supplies

Next step was to create the pretty butterfly using the products from the above picture.

butterfly

The butterfly was die cut using white cardstock and and super adhesive paper.  Then it was time for the fun of  adding the glitter.

butterfly

I removed the outline of the butterfly and glittered using the new Chameleon glitter.

butterfly1

Next I removed the areas that I wanted to be glittered with new Enlightened glitter.  This is a beautiful blue color!!

butterfly2

I removed all the remaining area, except the circles and ovals.  These were glittered with Hyacinth glitter.  This is a new glitter also and it is just gorgeous!  The remaining pieces were removed and glittered using Cloud Nine glitter.


Covering only parts of the chipboard with the Pineapple EP, I heat set.

flourish

Allowing the chipboard to cool I then ink the remaining areas and applied Cotton Candy and Skylight EP.  I
hope you can see how pretty these embossing powders are.


The lattice was die cut using Spellbinders Grateful Lattice and placed on top of the background paper.  The chipboard was placed on top of the lattice and the butterfly was adhered to the chipboard using a foam dots.

Thank You

Want2Scrap pearls were added to the center of the butterfly.

Thank You

Using a piece of leftover background paper the sentiment was stamped using the Thinking of You stamp set, and fussy cut out.

Thanks so much for stopping,  have a wonderful day and remember....Keep Stamping!