This is the day the LORD has made. We will rejoice and be glad in it.....PSALM 118:24

Friday, January 8, 2016

You are in my Thoughts


Good morning everyone, it's Friday (yay)!!  Sharing another card made with a newly released stamp set from Sparkle N Sprinkle, the digi Poppies.  


Using an A2 size card I trimmed down about 2" from the top and punched the edge with a circle punch to create my card base.  I embossed a strip of white cardstock using a Anna Griffin border embossing folder.  


The sentiment was printed and layered onto the card front.  Using dimensional glue I placed 4 dots of glue and covered with Fire Engine Red glitter.  Allowed to dry overnight then brushed off the excess glitter.  A red Pull Ribbon bow was added to the front.


For the inside I printed the single poppy from the set and centered it inside the circle opening.  A second flower was printed and fussy cut out and placed on top of the first image using a pop dot.  To create the splattered  look I used Alizarin Crimson Color Burst with water.  Dip a small brush into the color and lightly tapped the brush splattering the color.  


Sparkle was added to the flower using a glue pen, Spirited Green and Fire Engine Red glitter.  For the bow I used a piece of 1/8" Tear-ific Tape removed the protective backing and rolled the tape to create a twine, covered with Fire Engine Red glitter.  You can find a tutorial HERE for this technique.

Thanks so much for stopping by have a very blessed day, and remember....Keep Stamping!!

Thursday, January 7, 2016

Sweet Birthday


Good evening everyone, I would like to share a shaker card I made for a sweet little girl in my Sunday School class.  I used the digi Birthday Queen from Sparkle N Sprinkle for this cute card!!


The image was re-sized, printed and cut out using my Silhouette.  I love using the digital version of stamps as they can be sized to fit any project.  The background layer was die cut using Spellbinder's Circle dies to create the window for the shaker.  Next I embossed a piece of white cardstock using a Anna Griffin embossing folder.  


The birthday queen was colored with copic markers and glittered using a glue pen along with Waterfall and Pinkerbell glitter.  


Using the largest 2 circle dies nested together I cut 2 pieces of black foam to create the window for the shaker elements. Next I cut a piece of acetate for the window using the circle die.  The sentiment was printed and placed on the card background.  Small hearts and micro beads were added and the shaker window was adhere to the card base.  A small silver Pull Ribbon bow was added to the front of the card.  Such a cute card for a sweet little girl!!  Oh and my grand daughter wanted to know if I could make her one ;)

Thanks so much for stopping by have a wonderful evening and remember....Keep Stamping!!

Entering this card in:

Wednesday, January 6, 2016

Thinking of You

Happy New Year all, hope you had a wonderful holiday season!!  I would like to share with you this morning a card using the newly released Thinking of You stamp set.

Thinking of You

To start off my card I used a piece of watercolor paper and sprinkled a small amount of Orange, Blue and Green Nuance powder on top.  It was then misted with water to let the colors come alive!!  This really created a beautiful background for my card.  Once the paper was dry it was embossed with a Anna Griffin embossing folder.  The raised embossed area was then lightly inked with brown ink.

Thinking of You

A strip of vanilla cardstock was embossed using a Anna Griffin border embossing folder.  A piece of 1/8 Tear-ific tape was placed on the top and bottom of the border piece and glittered using Parisian Mist glitter.  The sentiment was stamped with brown ink and fussy cut around.

Thinking of You

The flowers were stamped using black ink and colored with copic markers.  They were then fussy cut out.  The center of the flowers were glittered using a glue pen and Bronze Splendor glitter.  For the sparkle on the leaves I used a glue pen and Spirited Green glitter. Next I cut a mason jar using my Silhouette, and placed the flowers on the jar.

Thinking of You

The bottom of the jar was covered with Glossy Accents and lightly dusted with Sparkling Snow glitter. I did not notice that when I misted the background paper that some of the color had gotten on the jar, but I really liked the look.  Sometimes mistakes are good!  The Glossy Accents were allowed to dry overnight.  To finish off I added a small bow using the Gold Pull Ribbon.

Thanks so much for stopping by have a wonderful day and remember...Keep Stamping!

Thursday, December 31, 2015

Sparkle N Sprinkle's January 1st Reveal


Welcome to Sparkle N Sprinkle's
 first New Reveal Blog Hop of 2016!


We have FIVE new stamp sets to share with you today.  These new sets are 20% off until Jan 3.  So once you finish the blog hop, head on over to the store and start shopping.  All of the new sets are available on cling mounted rubber or as a digital image.  


The sets are:


Three Tenors 767 (digi version DIGI767)
 Sing On 768 (digi version DIGI768)
  Thinking of You 769 (digi version DIGI769)
 Happily Ever After 770 (digi version DIGI770)
 Poppies 771 (digi version DIGI771)


On Jan 3rd, ONE GRAND PRIZE WINNER will be selected from the comments left on the Designers' blogs listed below. Please leave a comment with each Designer in order to be eligible for the Grand Prize.  You never know who the Mystery Designer will be that has the winning comment. 

The Grand Prize Winner, which will be announced on the SNS Facebook page and on the SNS Blog, will receive ALL of the new stamp sets released this month (or the digi versions, if preferred).


The Blog Hop order this month is:

Shona
Marie

Jess
Eret
Diane
Belinda (that's me)
Anne

(*Tip: if you have difficulty with a particular link, try clicking on the Designer's blog title to send you to their Home page.)


Happy New Year everyone, hope you had a wonderful Christmas and are ready for a new year of crafting fun!!  I choose to use the digi version of Happily Ever After to create a shadow box. For the background and frame around the outside, I started with a piece of sticker paper, removed the backing and placed a piece of lace on top of the adhesive.  The entire piece was glittered using Golden Silver glitter.  The lace was removed and the remaining area was glittered using Silver Dreams glitter.  This is the Lace Background technique, you will find a tutorial HERE on how to create this beautiful sparkly paper.  The shadow box was then cut using a svg file and my Silhouette.  


 The image was printed using the color image and cut out using my Silhouette.  Glitter was added to small areas of the bride and groom using a glue pen, Sparkling Snow and Spirited Green glitter.  


Small dots of Opal Liquid Pearls was added to the bride's hair.


The flowers were die cut using Tim Holtz's Tattered Flowers from white cardstock and inked with Memento Rose Bud ink.  The wedding rings were cut using a svg file from sticker paper and glittered using Golden Silver and Sparkling Snow glitter.  The flowers were layered on the shadow box using pop dots.  A small Pull Ribbon bow was added behind the flowers.  The sentiment was printed, fussy cut apart and placed on frame using pop dots.  Pearls were added to the flowers and frame.

We hope you enjoy the New Reveal Blog Hop as much as we do.  Thanks for joining us and remember to comment on each of the Designers' blogs to be eligible for the Grand Prize.  
 Wonder who the Mystery Host will be this month????

The next stop on our blog hop is Anne


The Sparkle N Sprinkle Creative Challenge also begins today.  There are lots of prizes and recognition badges.  Come check out how you can become a SNS Featured Artist as well.  The theme is always Anything Goes using Loose Glitter, Embossing Powder, and/or Flock.


Have you checked out the SNS YouTube Channel featuring Demo Donna?  If not, then you are in for a real treat.  Subscribe today to get all the latest Demo Donna tips and techniques!


Wednesday, December 9, 2015

Season Greetings


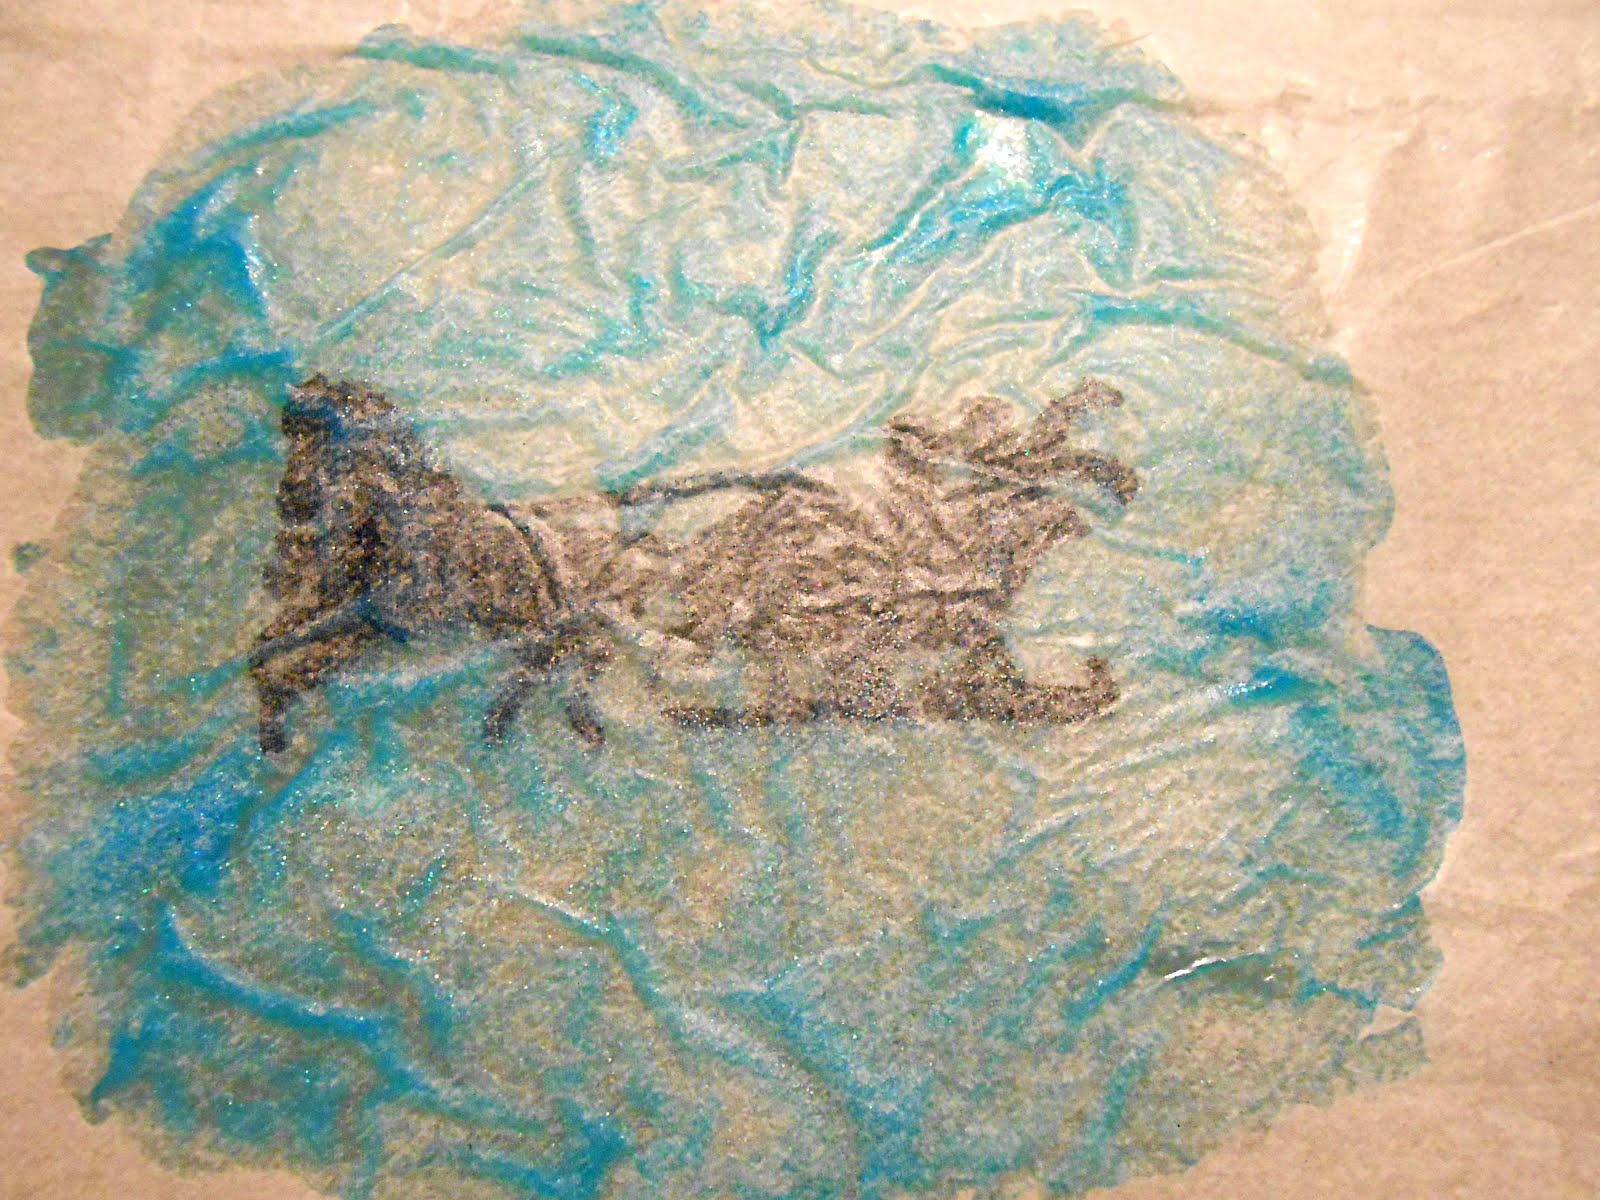
Good morning everyone, hope your day is off to a great start!!  Today I would like to share a card using embossable acetate, stamps, tissue paper and glitter.


To start with I stamped the background images on a piece of cardstock.  I used the trees from SNS Winter Swirl stamp set.  Next I used the antistatic bag on my piece of acetate.  The sleigh from, SNS Sleigh Ride stamp set was stamped onto the embossable acetate using versamark and embossed using Black Detail EP. 


Flip the embossed image over and place Glossy Accents over the entire image.  I used a small piece of blue gelato and mixed it with the Glossy Accents to create this pretty blue color.  A light dusting of Sparkling Snow glitter was added to the Glossy Accents.  


I then placed a piece of white tissue on top of the wet Glossy Accents smoothed out the wrinkles and flipped over.  This was then placed on top of the Winter Tree stamped image .  Let dry completely about an hour.  I then die cut the entire piece using Sizzix Funky Label dies.


Using a piece of glitter paper, I created a frame using the Funky Labels.  The background paper was embossed with Anna Griffin's Snowflake Embossing Folder.
The background paper was then layered onto a 5.25 x 5.25 card.  A small line of glitter was added to the edges using a glue pen and Sassy Silver glitter.


I placed a piece of 2 1/2" Tear-ific Tape on top of white cardstock.  Removed the backing and cover with Cloud Nine Glitter. I stamped the sentiment from the Sleigh Ride stamp set with black ink on top of the glitter.  Fussy cut around the wording.  


The snowflake was die cut using Anna Griffin's die and sticker paper.  The snowflake was glittered using Sparkling Snow glitter.  

Thanks so much for stopping by have a wonderful day and remember....Keep Stamping!!

Monday, November 30, 2015

Sparkle N Sprinkle's December 1st Reveal


Welcome to Sparkle N Sprinkle's
 Dec 1 Blog Hop!


This month the Designers were given a Surprise Package full of products found at the SNS Shoppe and were asked to create projects with these products.  So sit back, enjoy the Hop and get ready to have those creative juices flowing!


On Dec 3rd, ONE GRAND PRIZE WINNER will be selected from the comments left on the Designers' blogs listed below. Please leave a comment with each Designer in order to be eligible for the Grand Prize.  You never know who the Mystery Designer will be that has the winning comment.

The Grand Prize Winner, which will be announced on the SNS Facebook page and on the SNS Blog, will receive a $20 gift certificate to go shopping at the SNS Shoppe.


The Blog Hop order this month is:

Anne
Shona
Jess
Belinda (your Here)
Marie
Eret
Irit

(*Tip: if you have difficulty with a particular link, try clicking on the Designer's blog title to send you to their Home page.)

We would also like to thank all the Guest Designers who joined us this year: Diane, Ashley, Ani, Chris, Irit, and Jess.  It was a pleasure having each of you on the team as Guest Designers!

We hope you enjoy the Surprise Package Blog Hop as much as we enjoyed creating projects for it.  Thanks for joining us and remember to comment on each of the Designers' blogs to be eligible for the Grand Prize.  
 Wonder who the Mystery Host will be this month????

I have had so much fun with this challenge, I love getting surprises and my bag was full of great surprises!!  This is what I came up with using the Cherry Blossom stencil, embossing paste, glitter, svg files and the Fan Geisha stamp set.

To start my card I decided on a swing card, tutorial on how to make found HERE.


For the front of the card, I used the Cherry Blossom stencil with Dreamweaver Pearlescent Embossing Paste.  I decided that I wanted the paste a pale pink color, so I used a small amount of pink gelatos and mixed it with the paste. While the paste was wet I lightly dusted with Sparkling Snow glitter for that bit of sparkle.  Next the center panel was embossed using Anna Griffin embossing folder.   Silver sparkle was added around the panel using a glue pen and Reflection glitter.  

The fan was cut from a svg file using the Silhouette.  I placed strips of 1/4" Tear-ific Tape on the back of the fan openings and glittered using, Peruvian Lily, Flirt and ParisianMist glitter.  A small gold bead was placed on the handle.


 A small flower and leaves were die cut and inked with distress inks.  For a little sparkle on the flower I used a paint brush, brushable glue and Sparkling Snow glitter.  A small pearl was placed in the center.


 A look at the card from the other side.


The image was colored using copic markers.  The sparkle was added using a glue pen, Daisy, Spirited Green and Champagne glitter.  Using a glue pen along with Sparkling Snow sparkle was added to the edges of the image panel.


The sentiment was stamped with versamark and embossed using Black Detail EP.


One last look at the card opened to the back panel.  

I'm leaving you with a peek of the other 3 projects of mine using the goodies in our surprise bag.  Hope you will check back to see the reveal of them.


Thank so much for stopping by, hope you have fun on the hop.  Be sure to stop by all the talented designers they have some really wonderful surprises for you!!

The next stop on our blog hop is MARIE

The Sparkle N Sprinkle Creative Challenge also begins today.  There are lots of prizes and recognition badges.  Come check out how you can become a SNS Featured Artist as well.  The theme is always Anything Goes using Loose Glitter, Embossing Powder, and/or Flock.


Have you checked out the SNS YouTube Channel featuring Demo Donna?  If not, then you are in for a real treat.  Subscribe today to get all the latest Demo Donna tips and techniques!


Wednesday, November 18, 2015

Birthday Queen

Good morning everyone I would like to share an easel card with you this morning. It was  made for a sweet little girl in my Sunday School class, using the newly released digi Birthday Queen stamp set.  She is so cute and perfect for a little girl's birthday!

Sweet Birthday

I choose to re sized the stamp to fit my Spellbinder's Fancy Ovals dies.  That is the fun of digi, you can make them any size to fit your project.  Once the image was printed and die cut I colored using copic markers. This is a look at the card closed.

Sweet Birthday

The flowers were die cut using Heartfelt Creations Sun Kissed Die.  Using a glue pen a little sparkle was added using Sparkling Snow glitter to the sweet Queen and flowers.  The sentiment was stamped with black ink and placed on top of the flowers using pop dots.

Sweet Birthday

The inside of the card.  The hearts were also re sized and printed out.  They were colored with copic markers and fussy cut out.  By placing them on pop dots it keeps the card standing.

Sweet Birthday

 A small amount of sparkle was added to the hearts using a glue pen and Sparkling Snow 
glitter.

Sweet Birthday

Thanks so much for stopping by, hope you have a wonderful day and remember Keep Stamping!