This is the day the LORD has made. We will rejoice and be glad in it.....PSALM 118:24
Showing posts with label SNS Sleigh Ride. Show all posts

Wednesday, December 9, 2015

Season Greetings


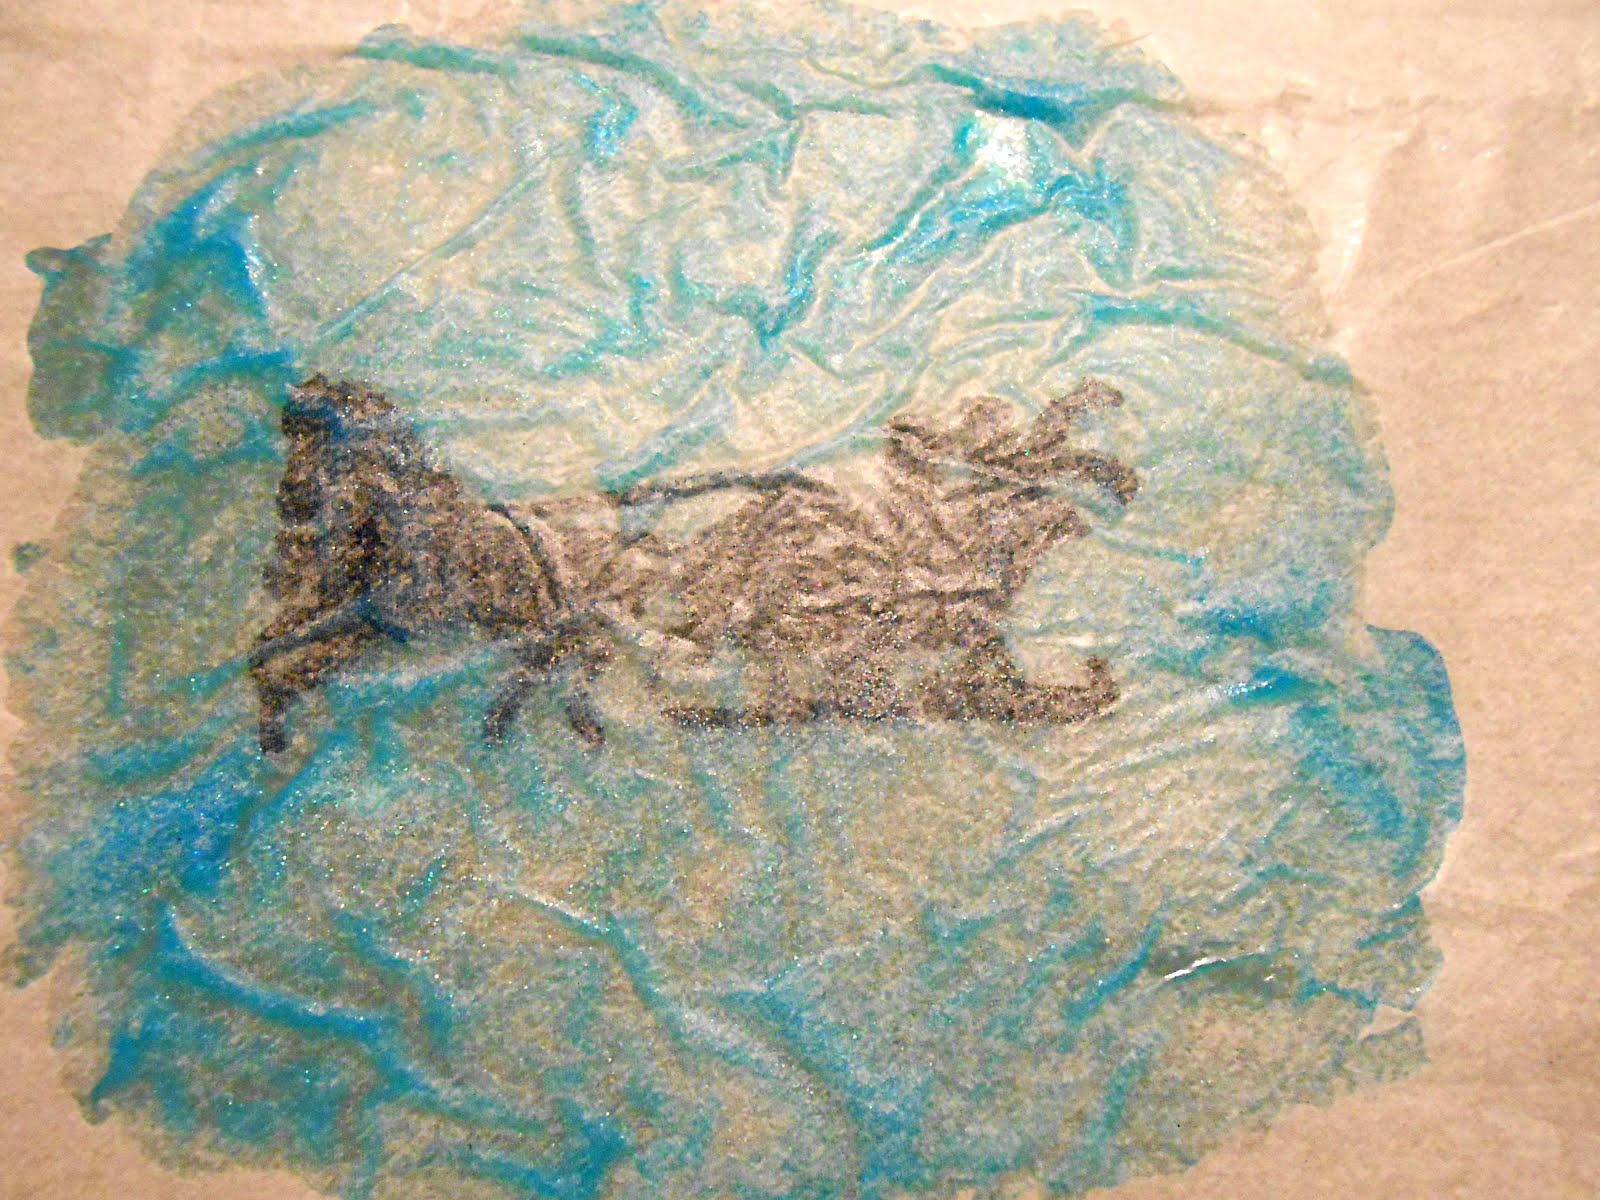
Good morning everyone, hope your day is off to a great start!!  Today I would like to share a card using embossable acetate, stamps, tissue paper and glitter.


To start with I stamped the background images on a piece of cardstock.  I used the trees from SNS Winter Swirl stamp set.  Next I used the antistatic bag on my piece of acetate.  The sleigh from, SNS Sleigh Ride stamp set was stamped onto the embossable acetate using versamark and embossed using Black Detail EP. 


Flip the embossed image over and place Glossy Accents over the entire image.  I used a small piece of blue gelato and mixed it with the Glossy Accents to create this pretty blue color.  A light dusting of Sparkling Snow glitter was added to the Glossy Accents.  


I then placed a piece of white tissue on top of the wet Glossy Accents smoothed out the wrinkles and flipped over.  This was then placed on top of the Winter Tree stamped image .  Let dry completely about an hour.  I then die cut the entire piece using Sizzix Funky Label dies.


Using a piece of glitter paper, I created a frame using the Funky Labels.  The background paper was embossed with Anna Griffin's Snowflake Embossing Folder.
The background paper was then layered onto a 5.25 x 5.25 card.  A small line of glitter was added to the edges using a glue pen and Sassy Silver glitter.


I placed a piece of 2 1/2" Tear-ific Tape on top of white cardstock.  Removed the backing and cover with Cloud Nine Glitter. I stamped the sentiment from the Sleigh Ride stamp set with black ink on top of the glitter.  Fussy cut around the wording.  


The snowflake was die cut using Anna Griffin's die and sticker paper.  The snowflake was glittered using Sparkling Snow glitter.  

Thanks so much for stopping by have a wonderful day and remember....Keep Stamping!!

Thursday, November 5, 2015

Season's Greetings

Good morning everyone, hope you are having a wonderful day!!  I have a easel card to share with you today, using SNS Sleigh Ride stamp sets.  This set is really pretty and worked so beautifully for my center image.


I used Spellbinders Radiant Rectangles dies to create my card.  For the bottom panel the oval panel was cut using sticker paper removed the backing and glittered using Sparkling Snow.  The sentiment was stamped with Memento Bahama Blue ink.  For the sparkly ribbon I used 1/2" Tear-ific Tape and Ocean glitter.  You can find a tutorial HERE on how to create glitter ribbon.  The snowflakes were punched using Fisker punch.


This is a look at my card closed.  Using a glue pen around the edges a small amount of Sassy Silver glitter was added.  The trees were stamped and fussy cut out.  A glue pen and Sassy Silver was also used to give a sparkle!


The inner panel was embossed using a Snowflake Embossing Folder.  The panel was lightly inked using Distress Ink, and inked all over with versamark.  The panel was then embossed using Sparkle EP.  The sleigh image was stamped with versamark and embossed using Dark Night EP.

I hope you have enjoyed my card, I love how pretty and sparkly it looks.  Thanks so much for stopping by, have a wonderful day and remember.....Keep Stamping!

I will be entering this card in the:

Saturday, October 17, 2015

If You Can't Fly

Good morning everyone, as Halloween nears I wanted to share another spooky card with you!!  For this card I used the witch from the newly released Cackle On stamp set and the digi trees from the Sleigh Ride stamp set from Sparkle N Sprinkle.


To start the card I needed to make my background using the Lacy Background techinque.  Using a piece of sticker paper placed on top of white cardstock, remove the backing and place the spider web lace on top.  I used Night Sky first, burnish well with my finger.  The lace was removed and the lace was covered with Sparkling Snow and burnish well.  It really created a spooky background for my witch.


Using  Spellbinder's circle dies the moon was die cut from CS.  I layer two of the dies together on top of sticker paper to make the outer ring for the moon.  The backing was removed and glittered using Purple Rain glitter.  The edges of the moon was inked and a small line of glitter was added around the moon with a glue pen and Orange Surprise glitter.


My witch was stamped with versamark onto the moon and embossed using Black Detail EP.

Next the fence was punched using MS punch.  A little sparkle was added on the fence using a glue pen, Purple Rain and Sassy Silver glitter.


To create the slime, dimensional glue was placed on acetate and covered with Green Nugget glitter.  Allow the slime to dry overnight, then peel away from the acetate and you have glittery slime.


The tree were made using the digi Sleigh Ride stamp set.  It were enlarged and printed using a laser printer.  The tree was then fussy cut out and foiled using my Anna Griffin Minc machine and silver foil.  


The cute little ghost was die cut using Anna Griffin die.  The raised embossing was glittered using a glue pen and Orange Surprise glitter.

Thanks so much for stopping by!!!  Have a wonderful weekend and remember....Keep Stamping!!

Wednesday, October 7, 2015

Winter Wonderland

Good morning everyone,  this morning I would like to share a bendy card using both the digi and rubber newly released Sleigh Ride stamp set.
The top of each piece of the card base was die cut using Elizabeth Craft Outdoor Edges dies.  This created really pretty snow hills for my card.


For the background paper I used the Lacy Background Technique, using sticker paper, Sparkling Snow and Rapture Blue glitter.  The pieces were cut and adhere to the card base.


The base for this card was cut and then I added the fence across the front using a svg file.  To added the snowy look on the fence I used White Liquid Applique. While the Applique was wet I applied Diamond Dust to the top.  The Applique was allowed to dry overnight and then was heat set.   The lights were die cut using Elizabeth Craft Holiday House die.  They were glittered using Lady LuckSassy Silver and Champagne glitter.


The sleigh image was stamped with versamark and embossed using Black Detail EP.


The trees from the digi set were enlarged, printed and fussy cut out.  Using a glue pen Sassy Silver glitter was applied to the branches.
The cute little lamp post was cut using svg files.  Glitter was added using Lady Luck, Fire Engine Red, and Evening Glow glitter.


The glittery house was die cut from sticker paper.  The backing was removed and each piece was glitter using Fire Engine Red, Sparkling Snow, Lady Luck, and Black Suede.


The deer silhouette is a stamp from the Reindeer set.  Small snowflakes were punched using a Fisker punch from sticker paper and glittered using Sassy Silver glitter.
Once all the pieces had been stamped and glitter the fun part was assembling the card.

Thanks so much for stopping by, have a wonderful day and remember....Keep Stamping!!

Wednesday, September 30, 2015

Sparkle N Sprinkle's October 1st Reveal

Welcome to Sparkle N Sprinkle's
 October 1 New Reveal Blog Hop!


We have SIX new stamp sets to share with you today.  These new sets are 20% off until Oct 3.  So once you finish the blog hop, head on over to the store and start shopping.  All of the new sets are available on cling mounted rubber or as a digital image.  


The sets are:
Witching Hour 742  (digi version DIGI742b)
  Cackle On 743  (digi version  DIGI743b)
  Sleigh Ride 744  (digi version DIGI744j)
 Jefferson 745  (digi version DIGI745b)
Wilson 746   (digi version DIGI746b)
Hats DIGI3120 (digi only)

On Oct 3, one GRAND PRIZE WINNER will be selected from the comments left on the Designers' blogs.  Please leave a comment with each Designer in order to be eligible for the Grand Prize.  You never know who the Mystery Designer will be that has the winning comment.  

The Grand Prize Winner, which will be announced on Oct 3 on the SNS Facebook page and on the SNS Blog, will receive ALL of the new stamp sets released this month (or the digi versions, if preferred).


In addition to our regular Designers, we are happy to introduce you to two new Guest Designers this month.  Irit and Jess will be our Guest Designers for the months of October, November, and December. 

 We'd also like to say Thank You to our second set of Guest Designers, Ani and Chris, for a job well done!


The Blog Hop order this month is:
Jess
Belinda (your here)
Eret
Marie
Shona
Anne
Irit

(*Tip: if you have difficulty with a particular link, try clicking on the Designer's blog title to send you to their Home page.)

Hope you all are enjoying all the beautiful project!!  I just loved the Halloween and Christmas stamps this month, really gets you in the mood for the upcoming holidays!!

I choose to use the Sleigh Ride set for my Reveal Project!


The design for my card is a Stand Up Card, you can find the template Here for the card base.  Once the base was cut, and the panels were cut I stamped the trees from the stamp set with versamark and embossed with Tinsel EP.   Small strips of white cardstock was torn to create the snow banks.  Using dimensional glue along the edges of the snow banks sparkle was added using Diamond Dust glitter.  A thin line of glitter was added around the edges of the white panel using a glue pen and Sassy Silver glitter.  The snowflake was cut using a svg file from Silhouette and glittered using brushable glue and Sparkling Snow glitter.  A belly band was made and a strip of 1/4" Tear-ific Tape was added to the middle.  I removed the backing and applied Sassy Silver glitter.  The Winter Wonderland is from the digi version of the Sleigh Ride set.  It was printed with my laser printer and foiled using Anne Griffin's  Minc and silver foil.  A small snowflake from  Snow One Like You stamp set was added.


Now the fun to create the inside began!


  I used stamps from the Reindeer Stamp Set and Tree Scene set.  First I cut all the panels, and began stamping the trees on the side panels.  They were colored with copic markers.  Using a glue pen on the snow area of the trees glitter was added using Sparkling Snow glitter.


Small snow banks were torn and inked with blue ink along the edges.  Sparkling Snow glitter was added along the top edges of the banks using dimensional glue.


The small deer was stamped on the left side of the card and colored with copic markers.


Now to create the main panel, I made a large snow bank using Elizabeth Craft's Outdoor Edges dies.  The top edge was ink and glitter.  The sleigh was then stamped with versamark and embossed using Black Detail EP.  The sentiment was stamped with Memento Bahama Blue ink.  A second snow bank was created and placed behind.  Next required a small bit of masking.  The deer were stamped first and a second one stamped and cut out.  Placing the cut out image on top of the 1st image the trees were stamped.  Remove the mask image and I had a beautiful winter scene.  The images were all colored using copic markers.  Small amount of sparkle was added to the deer using a glue pen and Sparkling Snow glitter.  To add the snow to the trees I used White Liquid Applique that was lightly dusted with Sparkling Snow glitter.  The trees were heat set the next morning to create the puffy look of snow. The sleigh panel was then adhere to the main panel and small snowflakes were added.  I was so pleased with how pretty this turned out.  Small thin line of glitter was added to the inside panel using a glue pen and Sassy Silver glitter.


A look from the side of all the beautiful sparkle!!

I would like to give you a small peek of projects to come using stamps from the Reveal!


Thanks so much for taking the time to stop by!!   Good luck to you all!

We hope you enjoy the New Reveal Blog Hop as much as we have enjoyed creating new projects for it.  We also hope that we have inspired you as well.  Thanks for joining us and remember to comment on each of the Designers' blogs to be eligible for the Grand Prize.  (We love reading these as your comments also inspire us.)  
The latest Mystery Designer was Shona.  Wonder who will be the Mystery Designer this month??  Be sure to visit all of the talented designers for some amazing projects!!

The next stop on our blog hop is Eret.


The Sparkle N Sprinkle Creative Challenge also begins today.  There are lots of prizes and recognition badges.  Come check out how you can become a SNS Featured Artist as well.  The theme is always Anything Goes using Loose Glitter, Embossing Powder, and/or Flock.

We hope you enjoy the New Reveal Blog Hop as much as we do.  Thanks for joining us and remember to comment on each of the Designers' blogs to be eligible for the Grand Prize.