This is the day the LORD has made. We will rejoice and be glad in it.....PSALM 118:24
Showing posts with label Nuvo Mousse. Show all posts

Tuesday, January 23, 2018

You're so Sweet

 
Good morning everyone, hope you are having a wonderful day!! I would to share a sweet card with you using the new Cara and Friend digi stamp set.  Let me show you how I put it together.


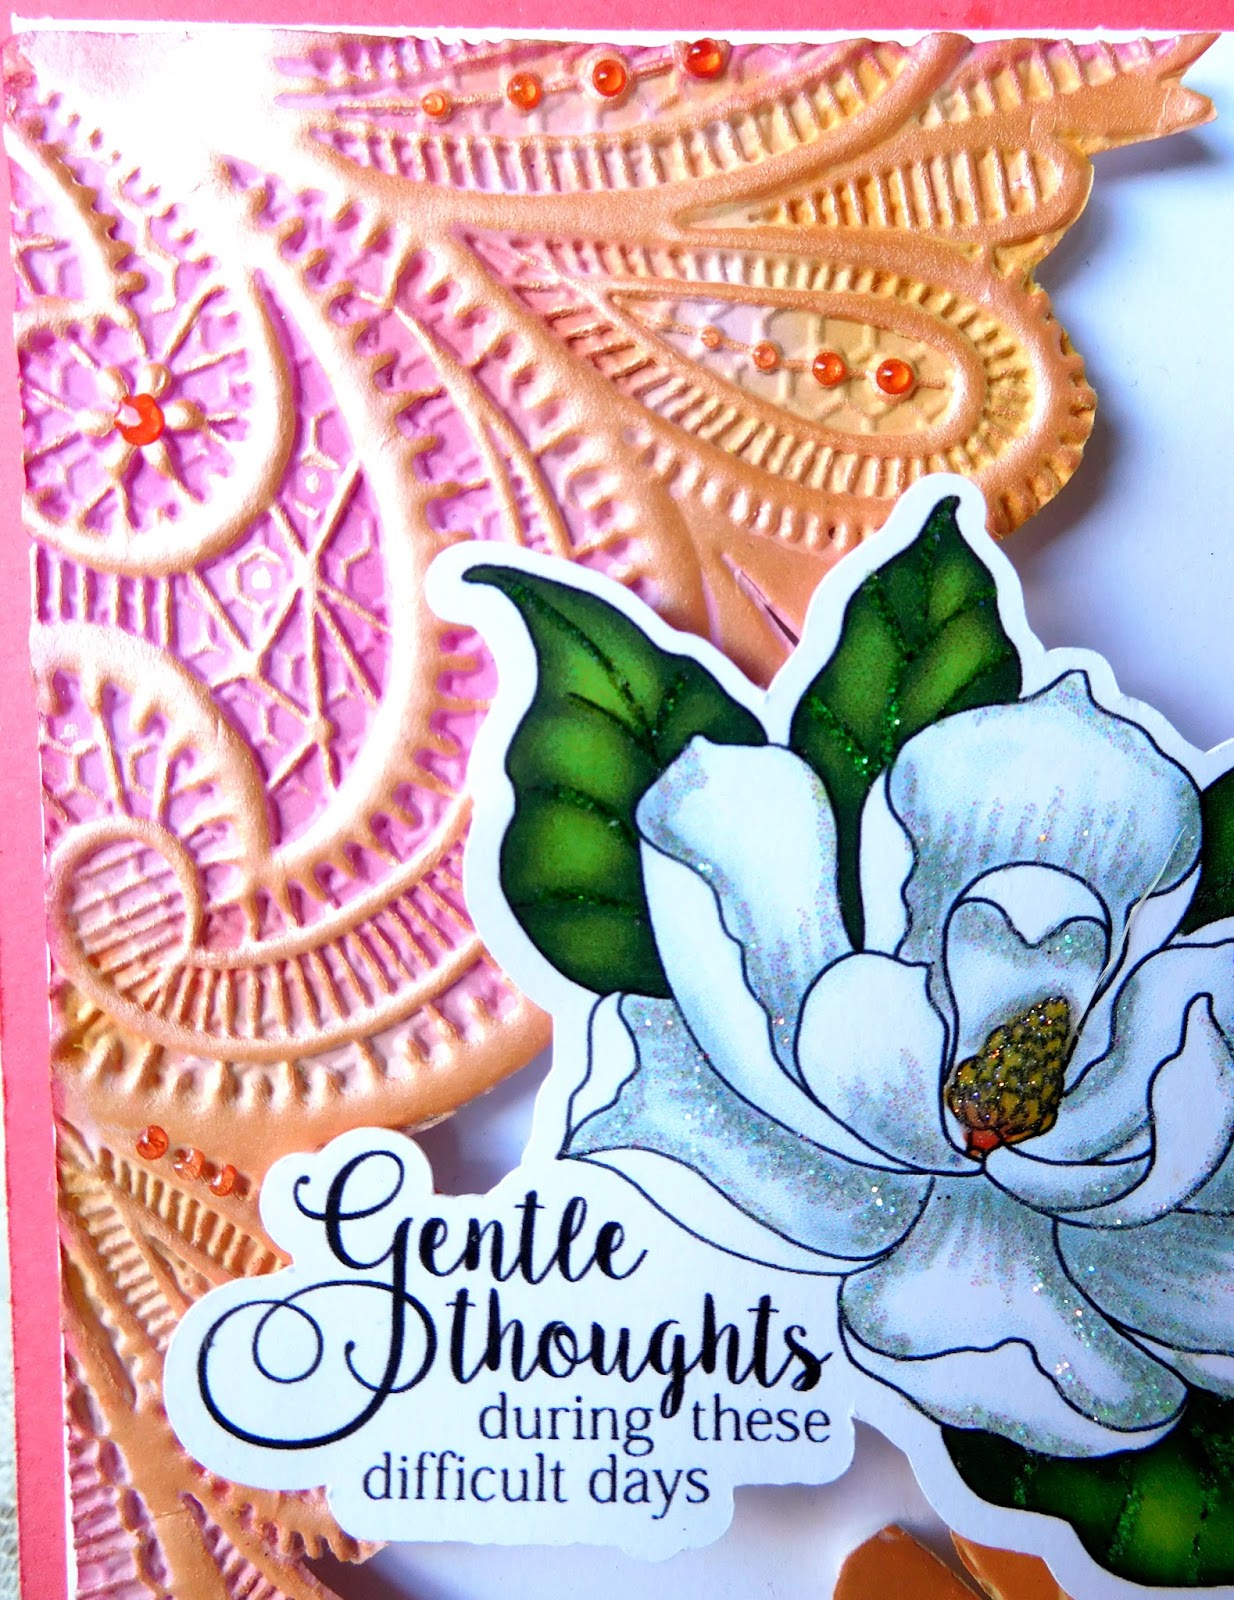
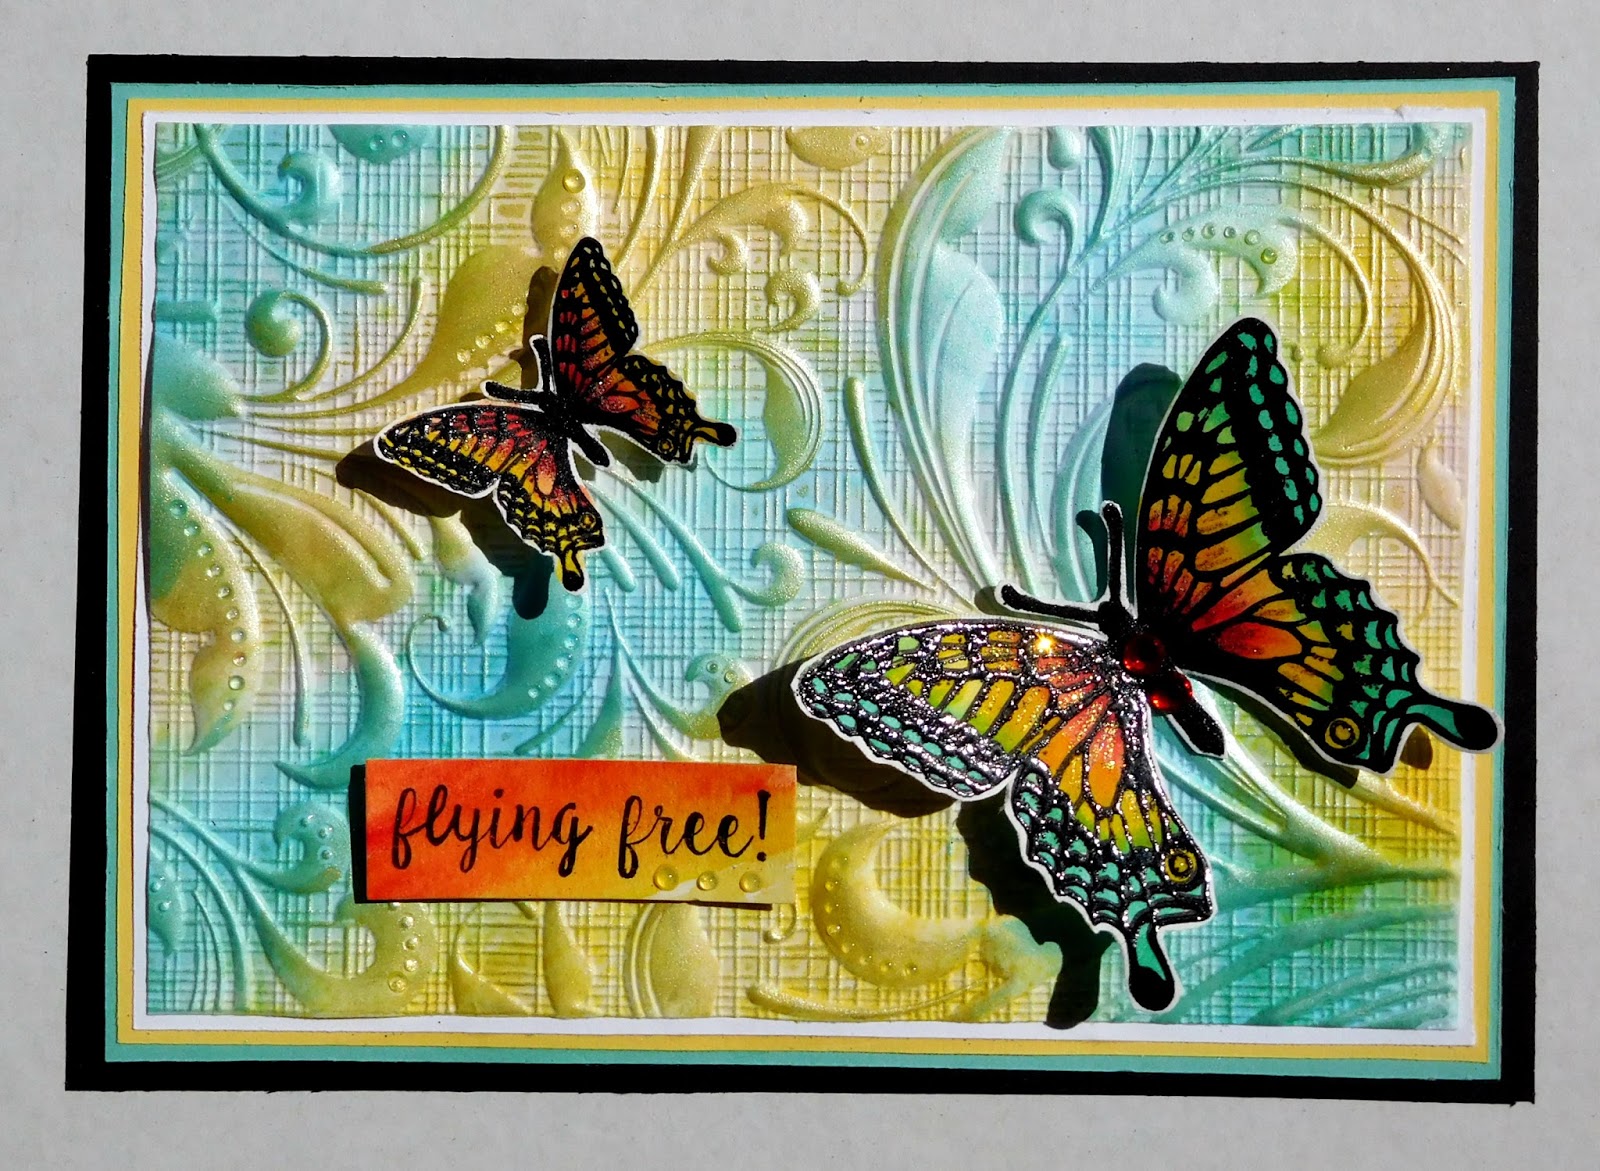
To start this card I need to create the background.  This was done using a 3d embossing folder from Crafter's  Companion.  A piece of watercolor paper was inked with Picked Raspberry, Orange Marmalade and Mustard Seed Distress ink.  The ink was misted lightly with water to allow it to blend together.  Once dry the paper was embossed.  To add a little shimmer to the raised areas I applied Pink Flambe and Calypso Coral Mousse to the pink and orange areas using my finger tool.  Small drops of Rosewater Jewel drops were placed on the embossed areas.


 For the yellow areas Lemon Sorbet Mousse using my finger tool. Small drops of Limoncello Jewel Drops were placed on the embossed areas.  Along the edges sparkle was added using the Quickie Glue Pen, Butterscotch and Pink Fizz.


Cara and her little friend was sized and printed out using the color digi image.  I really love this sweet little image!  Glitter was added using the Quickie Glue Pen, Pink Fizz, Butterscotch, Sparkling Snow, Spirited Green glitter  Small drops of Ebony Black Crystal Drops were added to the flower centers on her shoes and headband 


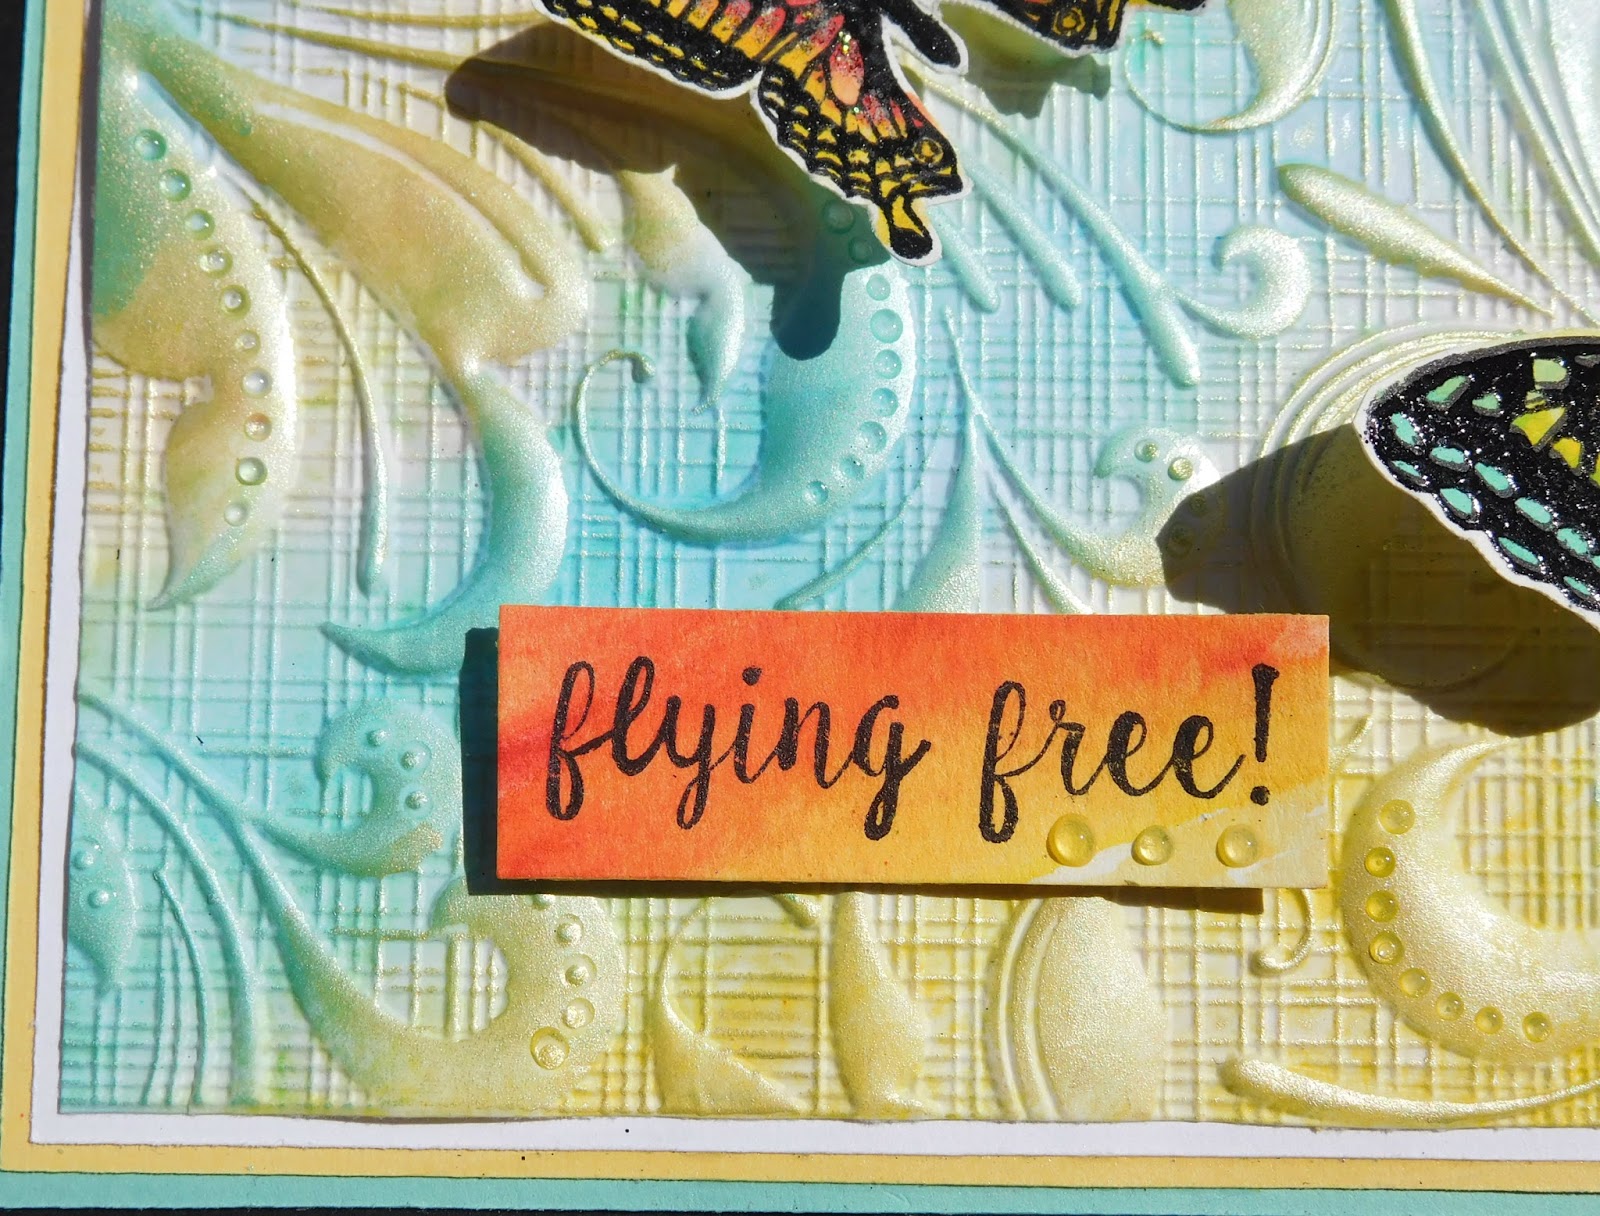
 The sentiment was sized, printed out and fussy cut around.  The edges were inked using Mustard Seed Distress ink and placed on the card using foam dots.


Thanks so much for stopping by have a wonderful day and remember....Keep Stamping!


Tuesday, November 28, 2017

Lovely You

Good morning all, hope your day is off to a great start!!  I would like to share a card with you using the new Botanical Orchid Flower stamp set from Sparkle N Sprinkle, Nuvo Mousse and a 3d embossing folder.  Come along as I show you how to create this card!


To create the background I embossed a piece of white cardstock with the Crafter's Companion 3d Embossing Folder.  Using my finger tool I added Lemon Sorbet and Aquamarine Nuvo Mousse to all the raised areas.  This really created a beautiful shimmery background.  Small drops of Sea Breeze Jewel Drops were added to some of the embossed areas.  The background was layered onto the card base and a small line of glue was added to the edges using the Small Glue Pen.  To the glue Mermaid glitter was added to give the card edges a little sparkle.


The beautiful Orchid was stamped using StazOn ink and colored using the Aqua Markers from Nuvo.  Sparkle was added to the flower using the small glue pen and Sparkling Snow glitter.  The sentiment was stamped and glittered using the small glue pen and Mermaid glitter.


  Small drops of Sea Breeze Jewel Drops were added to the top and bottom corners.  Strips of 1/2" Tear-ific Tape was placed around the edges of a piece of white cardstock and glittered using Mermaid glitter.  The flower panel was then adhered to the glittered cardstock panel and placed on top of the card base using foam dots.
 
Thanks so much for stopping by have a wonderful day and remember....Keep Stamping!!


Tuesday, October 31, 2017

Navy Nurses

 
Happy Halloween all, this morning  I would like to share a pretty card with you using the digi Navy Nurse stamp from Sparkle N Sprinkle.  This stamp only comes as a digi stamp and can be used for so many different occasions.  Let me show you how it came together.


To start the card I embossed a piece of blue cardstock using a Sizzix embossing folder.  Nuvo Mother of Pearl Mousse was applied to the raised areas using my finger.  This really created a beautiful shimmer to my cardstock.


Next the image was re sized,  printed using the color stamp and cut out using the Silhouette.  Sparkle was added using the Quicky Glue Pen and Sequin Gold.  A small scalloped circle was punched using a circle punch from Fisker.  The image was placed on top of the scalloped circle using foam dots.


To finish off the card I placed a piece of white cardstock diagonally across the card and cut off excess cardstock.  Next 1/4" and 1/8" Tear-ific Tape was placed diagonally on top of the white cardstock.  The protective backing was removed from the 1/4" tape and glittered using Sequin Gold glitter.  The remaining 1/8" tape was glittered using Cobalt Glaze glitter.


Being a military mom I was so glad to see a military stamp in this month's reveal!  I hope you will hop on over and see all the beautiful digi stamp sets, they are so much fun to play with and can be sized to fit any project. 
 
Thanks for stopping by have a fun and safe day and remember.....Keep Stamping!


Friday, October 13, 2017

Good Times

 
Good afternoon all, today I would like to share my last card from Sparkle N Sprinkle's September Reveal!!  This card was created using the new Birdhouse Friends stamp set. 


To start my card I embossed a piece of white cardstock using the 3d Embossing Folders from Crafter's Companion.  These folders are so beautiful!!  Once embossed Cornflower Blue Mousse from Nuvo was applied to the raised areas using my finger.  These mousse are so pretty and shimmery and work perfectly with these embossing folders.


The flowers were die cut using dies from Heartfelt Creations and glittered using the Nuvo Small Glue Pen and  Sunny Daze glitter.  Small drops of Bottle Green Crystal Drops were added to the centers.  They were placed on the card using foam dots.


The sentiment was stamped with Peacock Feathers Distress Ink and glittered using the small glue pen and Waterfall glitter. 
 
Thanks so much for stopping by, be sure to stop back by on the 15th to see Sparkle N Sprinkle's October Reveal!!  There will be a new beautiful stamp sets revealed and a chance to win them all! 
 
Have a great weekend and remember...Keep Stamping!!

Tuesday, September 26, 2017

Gentle Thoughts

Good morning everyone, hope you are having a wonderful start to your day!!  Today I would like to share a digi card with you using the new digi Lovely Magnolia stamp set from Sparkle N Sprinkle.  Let me show you how it all came together.


To start the card I needed to create my background paper.  Using distress inks, water and paper towel this was create.


Ink a piece of watercolor paper using Picked Raspberry and Spiced Marmalade distress ink.  Place a piece of paper towel on top and lightly mist with water.  Let sit for about 30 minutes.  Remove the paper towel and you have a beautiful piece of background paper.  I love the way the paper picks up the design of the paper towel.  Once dry I embossed the piece using a new Crafter's Companion 3d Embossing Folder. (sorry I forgot to take a picture)


 Once dry the piece was fussy cut around the outer edges of the embossing.  This was then used on the outside edges of the card.  Using my finger on the raised areas of the embossing Coral Calypso Mousse from Nuvo was added for a pretty soft shimmer.


The flower and sentiment was then sized, printed out and cut using the Silhouette.  Sparkle was added to the flower using the Small Glue Pen from Nuvo, Sparkling Snow and Spirited Green glitter.  The flower was placed on top of the card using foam dots.


Small drops of Strawberry Coulis Jewel Drops were placed on the embossing areas.
 
Thanks so much for stopping by have a wonderful day and remember.....Keep Stamping!!


Tuesday, August 1, 2017

Every Snowflake is a Wonder

 
Good morning all it's another Christmas in July card using the new Crystal Snowflake stamp set and the digi Winter Greetings paper bundle from Sparkle N Sprinkle.  Let's get started on how this came together.


 The digi paper was printed out and cut into strips to create the pendant and border strip.  Using Tear-ific Tape sparkle was added using the Fire Engine Red and Sassy Glitter.


  The background panel was embossed with a Cuttlebug embossing folder. Shimmer was added using Cornflower Blue Mousse.


The larger snowflake was stamped with versamark and embossed using Tinsel EP.  The smaller snowflake was stamped with Memento Bahama Blue ink fussy cut out and glittered using Nuvo Small Glue Pen and Sparkling Snow glitter.  A small drop of Sea Breeze Jewel Drops was added to the center.


Next the sentiment was stamped with the Bahama Blue ink and punched using an Fisker oval punch.  Small drops of Sea Breeze Jewel Drops were placed on the ends and also in the centers of the snowflakes.
Thanks so much for stopping by have a great day and remember......Keep Stamping!!


Products used on this project:


Wednesday, June 14, 2017

Sparkle N Sprinkle's June New Reveal


Welcome to the Sparkle N Sprinkle
 June Reveal Blog Hop!


We are now revealing our new stamp sets on the15th of each month.  On the first of the month, a new video kit club will be revealed.

We are continuing to add new product lines, so be on the look out for them.  The newest addition is Hampton Arts.


We have four new rubber stamp sets plus one huge digi bundle being revealed this month.  

The sets are:


(Digital Version DIGI851BG - additional sentiment)
  (Digital Version DIGI854LS - additional sentiments)
(Digital Version DIGI856FS - see below)
(Digital Version DIGI857SG - additional sentiments)

DIGI856FS - Swallowtail Butterflies (includes lots of additional colored images, additional sentiments, and digi paper)


When you purchase the digi versions of any of the SNS rubber sets, you are getting lots of extras that aren't available otherwise.  These extras include additional images and/or sentiments not available with the rubber version, digi papers (in some cases), and a cut file to use with your electronic cutting machines will also be included with all digi images purchased!

You're definitely going to want both the rubber versions as well as the digi versions of all our new releases.

The new sets are 20% off until June 20, 2017.  So once you finish the blog hop, head on over to the New Store and start shopping.

On June 18th, ONE GRAND PRIZE WINNER will be selected from the comments left on the Designers' blogs listed below. Please leave a comment with each Designer in order to be eligible for the Grand Prize.  You never know who the Mystery Designer will be that has the winning comment.

The Grand Prize Winner, which will be announced on the SNS Facebook page and the SNS Blog, will receive ALL of the new rubber stamp sets revealed this month.


The Blog Hop Order this month is:
Belinda  (your here)

(*Tip: if you have difficulty with a particular link, try clicking on the Designer's blog title to send you to their Home page.)


We hope you enjoy the New Reveal Blog Hop as much as we do.  Thanks for joining us and remember to comment on each of the Designers' blogs to be eligible for the Grand Prize.  

 Wonder who the Mystery Host will be this month????


Have you checked out the SNS YouTube Channel featuring Demo Donna?  If not, then you are in for a real treat.  Subscribe today to get all the latest Demo Donna tips and techniques!


We are also happy to announce the new and improved SNS Creative Challenge.  It will now be held on Facebook. 

 Search for the Sparkle N Sprinkle Creative Challenge group and ask to join today.  This is a closed group, but we want anyone who wants to participate to join (just trying to keep out spammers 😀).  You can join today!

 The new challenge will begin July 1 and will run from the 1st - 25th of each month.  A SNS image (either rubber or digi) needs to be used.  If you don't have any yet, no worries, there are some Freebies located on the new website.  They are located on the Home page, just scroll down a bit to see them:

The Winner and Top Three will be posted on the last day of each month.  The Winner will receive a $15 Gift Certificate to the new on-line store.  Please review all the Challenge Rules before submitting your photo.

We hope to see you soon in our new Facebook Group!

Hope you all are having fun on the blog hop!!  I just love all of the stamp sets this month, but my favorite was the beautiful Swallowtail Butterflies.  Let me show you how my card came together.


The background paper was created using distress ink and a blending tool.  The cardstock was covered with Mustard Seed and Peacock Feathers ink blending well.  


Once all the white areas were covered I laid a piece of slightly wet paper towel on top to blend the inks together.  


The wet paper towel lighten the ink and created a beautiful background for my butterflies.  I really wanted a bit of shimmer so after the cardstock was dry, I embossed it with the new Crafter's Companion 3d Embossing Folders.  They are so beautiful!!  The next step was to embellish the embossing using Lemon Sorbet and Aquamarine Mousse from Nuvo.  I did this using my finger and the result was so pretty.  Small drops of Sea Breeze Jewel Drops were placed on the small dot in the embossing.  


Next it was time to start on the butterflies.  I stamped the butterflies onto watercolor paper.  This was done using the Misti and StazOn ink.  Leaving the paper in the Misti the butterflies were colored with Nuvo's Red Apple, Lemon Zest and Aqua Splash Aqua Markers.  Once the ink was dry the butterflies were re stamped with versamark and embossed using Clear EP.  


The same technique was used on the smaller butterfly using only the Red Apple and Lemon Zest markers.  Both butterflies were fussy cut out and placed on the card using foam dots.


For the sentiment I blended the Red Apple and Lemon Zest on a piece of watercolor paper.  Once dry the sentiment was stamped with Memento Tuxedo Black ink and small drops of Limoncello Jewel Drops were added.  


I would like to leave you with a sneak peek of my other projects to come, hope you will come back by to see the reveal!!

Have fun on the hop and enjoy all the beautiful projects!!

Next stop on your blog hop is the wonderful and very talented Eret!!!

Tuesday, May 30, 2017

I Think You Are Amazing

Good morning all hope you had a great Memorial Day weekend!!  Today I would like to share a easel card with you using the new True Beauty digi and rubber stamp set from Sparkle N Sprinkle.  Let's get started!!


The easel card base was created using the Elizabeth die from Crafter's Companion. 
 Once die cut Aquamarine Mousse was used for a soft shimmer.


Next the beautiful peacock was resized and printed out using the color digi stamp.  This was then cut out using the Silhouette.  The image was layered on cardstock with the back layer edges glittered using 1/4" Tear-ific Tape and Perwinkle glitter.  


Sparkle was added to this pretty bird using Nuvo Small Glue Pen, Spirited Green, Misty Blue and Crystal Ice glitter.  She really sparkled!! Drops of  Violet Galaxy Crystal Drops were placed on the peacock tail.


The center panel was embossed using a Anna Griffin embossing folder and the Aquamarine Mousse. A small purple ribbon was tied around the embossed panel. Around the edges of the embossed panel glitter was added using the small glue pen and Priceless Peacock glitter.


To finished off this easel card, I used the rubber stamp sentiment and stamped with Memento Sweet Plum ink.  It was then die cut using the smaller die from Tonic Eastern Oyster Die set.  Small drops of the Violet Galaxy Crystal Drops were placed on the sentiment and center of the Elizabeth die.  Finally strips of 1/8" and 1/4" Tear-ific Tape were placed on the edge and glittered using Perwinkle and Priceless Peacock glitter.

Thanks so much for stopping by have a great week and remember....Keep Stamping!!

Monday, March 27, 2017

Each Day Always Holds Beautiful Moments

 Happy Monday all, hope you had a great weekend!!!  This morning I would like to share my last card using the new stamps from Sparkle N Sprinkle's March Reveal, it is using the Bonnet Bouquet stamp set.  I did use both the rubber and digi stamps on this card.


 To start my easel card I used Spellbinder's Fancy Circle dies to cut the card base.  To create the pretty shimmer background paper I covered a piece of heavy cardstock with Nuvo Aquamarine Mousse,  Nuvo Lemon Sorbet Mousse and Nuvo Spring Green Mousse.  Once it was dry It was die cut with Spellbinder's Circle dies.  This really created a beautiful shimmery background for my card.  These mousses are so beautiful be sure to look them up in the SNS store!


Next the image was stamped on top of cardstock that had been prepped with clear gesso for water coloring.  The image was colored using Tombow markers and a aqua brush.  Once dry sparkle was added using Nuvo Small Glue Pen, Waterfall and Sunny Daze glitter. Drops of Orange Marmalade Jewel Drops were placed in the center of the flowers.  The image was fussy cut out and placed on top of the card front.  Small drops of Dandelion Crystal Drops were added around the fancy circle.


For the inside of the card I printed the flower and sentiment from the color digi set which I did enlarge.  The flower was cut using my Silhouette and the sentiment was fussy cut.  Glitter was added to the flower using the small glue pen, Spirited Green and Sunny Daze glitter.  Small drops of Ebony Black Crystal Drops were added to the flower.  


A look at the card closed!

Thanks so much for stopping by be sure to hop over to the Sparkle N Sprinkle store to see all of their wonderful products!!!

Have a wonderful day and remember.......Keep Stamping!!!

Products used on this project:

STAMP CREDITS:

OTHER SUPPLIES:
Inks:  Memento Tuxedo Black
Adhesives:  NuvoSmall Glue Pen (202N), Foam Dots
Dies:  Spellbinder’s Fancy Circles, Spellbinder’s Circles
Coloring Medium:  Tombow Markers


Wednesday, November 23, 2016

Let It Snow!


Good morning everyone, and Happy Thanksgiving Eve!!  Today I would like to share a Christmas tag with you using the new Christmas Tag #2 stamp set from Sparkle N Sprinkle.  It was paired with Snow One Like You stamp set also from Sparkle N Sprinkle.  


To start the tag I embossed a piece of blue cardstock with a Anna Griffin embossing folder and lightly rubbed the raised areas with Nuvo Pure Platinum mousse.  This gives such a pretty shimmer to the embossed areas.  Small drops of White Crystal Drops were placed on the center of the snowflakes.  Using Elizabeth Craft's Outdoor Edges dies the snowbanks were created.  The top edges where inked and glittered using Sparkling Snow glitter.


The cute little snowman from Snow One Like You was stamped and colored using copic markers.  Waterfall glitter was added to the image using Nuvo small glue pen.  The large snowflake is a svg file cut using the Silhouette.  Mother of Pearl mousse was applied to the larger snowflake.  The smaller was glittered using brushable glue and Sparkling Snow glitter.  A large drop of Moondust Crystal Drop was placed in the center.  


The image from the Christmas Tag #2 was stamped colored with copic markers and glittered using Nuvo small glue pen along with Waterfall and Silver Dreams glitter.  It was die cut using Spellbinder's Circle die.  The small circle was placed inside the larger one using a foam dot.  A pull ribbon bow was added to the top. 

Please visit the Sparkle N Sprinkle store to see all the new products they are so pretty!!

I hope you have enjoyed this project, thanks so much for stopping by have a wonderful day and remember.....Keep Stamping!!

Wednesday, September 7, 2016

Don't Be A Scardey Cat


Good morning all, hope your day is off to a great start.  This morning I'm sharing a spooky Halloween card with you.

Halloween Cat Stamp
To create this card I embossed a piece of black cardstock with a Sizzix embossing folder.  On the raised areas I used Pure Platinum Mousse to give that shimmer look.  On the DP creepy eyeballs were added using Crystal Drops Ebony BlackWhiteApple Green and Dandelion Yellow.  The little ghost was die cut using a Recollections die eyes were added using Crystal Drops White and Ebony Black.  To the edges I used a glue pen and Sparkling Snow glitter for that little sparkly.  To give the DP edges a little pop I used a glue pen and Sassy Silver glitter.

Halloween Cat StampThe image is the Halloween Cat and it was stamped using black ink and embossed with Clear EP.  Next I took a sponge dauber and Spiced Marmalade ink and inked in the moon.  A glue pen, Sassy Silver and Pistachio glitter was used to add the sparkle to the image. Bats were die cut using a Recollections die from sticker paper and glittered using Black Suede glitter.  Little eyes were added using Ebony Black and White Crystal Drops.  They were adhered to the card using foam dots.

Halloween Cat Stamp

The sentiment was stamped with versamark and embossed using Jazzy Orange EP.  It was then fussy cut around inked with Bamboo Leaves ink and adhered to the card using foam dots.  Small eyes were added to the spider web using White and Ebony Black Crystal drops.  These Crystal Drops are so much fun and make spooky eyes on any Halloween card.  If you have not tried them hop on over to the store to see all the wonderful colors, you will love them!!
Thanks so much for stopping by, have a wonderful day and remember.....Keep Stamping!